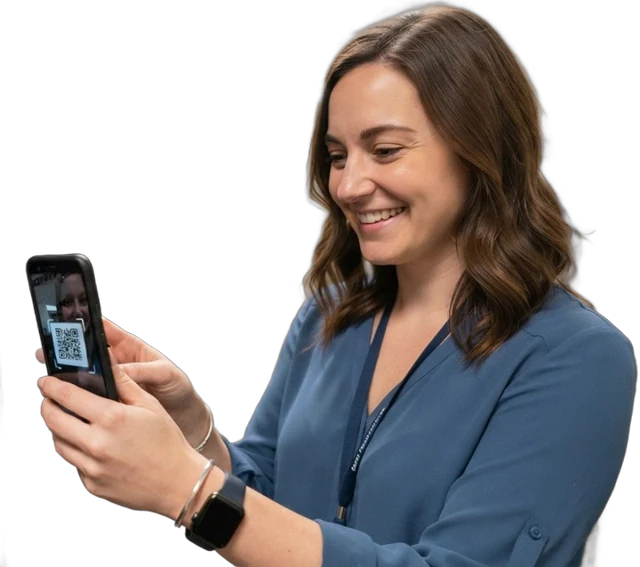
Fixed asset verification is the moment the asset register is tested against reality. Someone walks the sites with the register in hand, confirms that each recorded asset exists, is where the register says and is in the recorded condition — and writes down everything that does not match. Done well, it gives finance a register it can defend, gives operations a list it can trust, and finds the losses and recording errors while they can still be fixed.
This guide covers what fixed asset verification is, why it matters, a step-by-step process, how tagging makes it faster, how often to do it, what a physical verification report and verification certificate should contain, and how to reconcile missing and unregistered assets. A free fixed asset verification report template (Excel and printable) goes with it.
- Verification checks existence, location, condition and completeness — in both directions: register to floor, and floor to register.
- Agree scope, cut-off date and an independent counting team before anyone starts.
- Classify every difference: verified, misplaced, missing or unregistered. Only confirmed losses become write-offs.
- Tag every asset with a unique ID so the count is a scan, not a search.
- Record the results in a report and a signed verification certificate, then correct the register.
What is fixed asset verification?
Fixed asset verification (also called physical verification, or an existence check) is the process of physically confirming the assets recorded in the fixed asset register. For each asset in scope, the verifier confirms that it:
- Exists — the item can be seen, and its tag or serial number matches the record.
- Is where the register says — at the recorded site, building and room, with the recorded custodian.
- Is in the recorded condition and status — in use, in store, or awaiting repair or disposal.
Good verification also works in the other direction: it records assets found on site that are not in the register at all. Checking register-to-floor proves existence; checking floor-to-register proves completeness. See asset verification in the glossary.
Verification is one part of a wider physical asset audit, which also covers planning, controls, sampling and write-off approvals. In smaller organisations the two words are used interchangeably.
Why verify fixed assets?
- Financial reporting and audit. Capitalised assets on the balance sheet must exist. External auditors commonly test this, and a recent, well-documented verification makes their work — and your year-end — smoother.
- Insurance. Accurate lists of what you own, where it is and what it would cost to replace support the right level of cover and make claims easier to prove.
- Ghost assets. Assets that are still in the register but no longer exist — lost, stolen, scrapped or sold without the register being updated — overstate the asset base. You may keep depreciating them, insuring them and paying maintenance contracts on them.
- Zombie and unregistered assets. The opposite problem. Assets that physically exist and are in use but are missing from the register, or were written off and forgotten, are invisible: nobody maintains, insures or plans to replace them. (“Zombie asset” is used loosely; whatever you call it, the fix is to register the item properly.)
- Loss control. Missing items found within weeks can often be recovered; items found missing a year later rarely can.
- Trust in the register. People only use a register they trust. Every verification that corrects locations and custodians makes the next one easier.
The fixed asset verification process, step by step
1. Agree the scope and the team
Write down what is in scope (sites, buildings, categories, any value threshold), the count dates and who is involved. Counters should not be the custodians of the assets they verify, and the person who approves write-offs should be independent of both. Brief everyone on what to record and how to treat untagged items.
2. Set a cut-off and freeze the baseline
Export the register as at a cut-off date and time. That export is the baseline every count is compared against. Freeze movements in the scope area during the count, or log every movement with its time and destination so it can be reconciled.
3. Prepare the register
Most verification time is lost to data problems, so fix what you can before counting: remove duplicates, close records for assets already disposed of, list known movements (open check-outs, items away for repair, pending transfers), and sort the baseline by location in walking order.
4. Count location by location
Work through each room systematically — for example clockwise from the door — and mark it complete. For each asset, scan or read the tag, confirm the description and (for high-value or portable items) the serial number, record condition, and note who verified it and when. Record assets found in the wrong room as misplaced; do not move them during the count. Record and tag anything that is not on the register.
5. Reconcile
Compare the count with the baseline and classify every record:
| Result | Meaning | Typical action |
|---|---|---|
| Verified | Found in the recorded location | None |
| Misplaced | Found, but somewhere else | Confirm the move and update the register |
| Missing | Not found | Second search; check check-out, repair and disposal records; ask the custodian |
| Unregistered | Found on site, not in the register | Find the source (purchase, transfer, replacement) and register it |
| Not checked | Location not counted yet | Count it, or record why it was excluded |
6. Report, approve and correct
Summarise the results in a verification report, get the certificate signed, approve write-offs under your delegation of authority, and update the register. Export a fresh baseline: it is the starting point for the next verification.
Fixed asset verification and tagging
Verification without tags is a search: the counter reads a description in a long list and hunts for something that matches. With a unique ID on a durable label on every asset, it becomes a scan — the ID identifies the exact record, and duplicates, swaps and similar-looking items stop being a problem.
- Give every asset a unique, permanent ID and print it as a QR code or barcode. Keep the ID meaningless (a prefix and a number) so it never has to change when the asset moves. The free asset ID generator and label generator help.
- Tag during the first verification. A first count is a good time to tag the whole estate: verify, label and record in one visit, using the asset tagging checklist.
- Choose the tag technology per asset class. QR and barcode labels suit most items and any phone can read them; NFC is quick to tap; UHF RFID reads many tags at once from a distance, which shortens large counts. See RFID vs NFC vs QR.
How often should fixed assets be verified?
There is no single rule — your auditors, regulators, funders or internal policy may set one. Common practice is:
- A full verification at least once a year, often timed before the financial year end.
- More frequent cycle counts (quarterly or monthly) of high-value, portable or high-risk categories — laptops, phones, tools, test equipment.
- Targeted checks after a reorganisation, an office move, a site closure, a custodian leaving, or a loss.
A rotating cycle count programme spreads the effort through the year so that the annual verification holds few surprises.
Physical verification report format
The report is the evidence that the verification happened and that differences were handled. Whatever template you use, include:
- Scope — organisation, sites, locations and categories covered, and anything excluded.
- Dates and team — register cut-off date, count dates, verification lead and counters, and confirmation that counters were independent of custodians.
- Results — assets on the register, verified, found in a different location, missing, not checked, and unregistered items found.
- Measures — verification accuracy (verified ÷ assets on the register), the share located anywhere (verified + misplaced), and the book value of missing assets.
- Differences — each difference with its investigation, resolution and any proposed write-off.
- Sign-off — verification lead, finance, asset owner and approver.
The fixed asset verification report template has a verification sheet that classifies every asset automatically, a sheet for unregistered items, a summary with these measures, and a printable report.
| Asset ID | Asset | Register location | Found? | Location found | Result | Action |
|---|---|---|---|---|---|---|
| AST-000123 | Dell laptop | Finance office 2.04 | Yes | Finance office 2.04 | Verified | None |
| AST-000126 | Office desks (set of 12) | Open office 1.10 | Yes | Meeting room 1.03 | Misplaced | Update register location |
| AST-000130 | Camera | Marketing store | No | — | Missing | Second search |
Illustrative rows from the template’s example data.
Fixed asset verification certificate format
A verification certificate is a short, signed statement that the verification was carried out and what it found. A typical format:
- Heading — “Fixed asset physical verification certificate”.
- Organisation, scope, register cut-off date and count dates.
- Statement — that the assets in scope were physically verified by the named team, that every asset on the register at the cut-off was checked, that the results are a fair record, and that differences have been investigated and actions proposed for approval.
- Headline results — assets on the register, verified, misplaced, missing, unregistered, verification accuracy and the book value of missing assets.
- Signatures — verification lead, finance or accountant, asset owner, and an approver such as a director, principal or treasurer, each with name and date.
The template’s Certificate sheet fills the numbers in from the summary, so the certificate always matches the report. Adapt the wording to what your auditors, board or funders expect.
Reconciling missing and unregistered assets
Reconciliation is where most of the value of a verification is created — and where most of the time goes.
Misplaced assets are register errors, not losses. Confirm the move with the custodian and update the location; if the same kind of item is often misplaced, the movement process is the real problem.
Missing assets need a second search before anything else. Check open check-outs, items away for repair or calibration, recent transfers and disposals, and ask the recorded custodian. Only an asset that is still missing after that becomes a proposed write-off, approved under your delegation of authority and recorded with the reason.
Unregistered assets need a source. Common causes are purchases expensed or bought on a card and never registered, transfers from another site, replacements that were never linked to the asset they replaced, and donated or borrowed items. Register owned assets with the best available cost and date; record borrowed items as such.
Watch for pairs: an unregistered laptop and a missing laptop in the same department are often the same asset with a lost tag. Asset reconciliation: missing and unregistered assets goes into the patterns in more detail.
How fixed asset verification software helps
A spreadsheet and a clipboard work for a few hundred assets. Beyond that, the counting, matching and correcting take longer than the walk itself. Fixed asset verification software changes three things:
- Counting becomes scanning. Counters scan QR, barcode, NFC or UHF RFID tags with a phone or handheld, and every scan is matched to the register immediately.
- Reconciliation is automatic. In Asetavo, a stock-take session scopes the count by site, location or category; at the end, found, missing, misplaced and unregistered assets appear as variances in a worklist, ready to confirm as moved, write off or ignore, with a variance export to Excel or CSV for your auditors.
- The register stays current between verifications. When check-outs, moves and returns are recorded as they happen, there is much less to correct at the next count — see check-in / check-out.
Asetavo’s asset register is free for up to 100 assets and 2 users with QR and barcode tags. Audits and stock-takes are on the Growth plan; the mobile scanning works in any phone browser today, and native iOS and Android apps are coming soon.
Templates and tools for your verification
- Fixed asset verification report & certificate — Excel and printable.
- Physical asset audit checklist — prepare, count, reconcile, sign off.
- Asset audit checklist generator and asset audit time calculator.
- Asset register template (Excel with depreciation) — the register you verify against.